

It's that time of the year again and also the perfect occasion to be dressing up and refreshing your cubby house space for a WHOLE new world of play for the kids. Think a real life gingerbread house, Santa's workshop or the Rudolph's barn at the North Pole! The lead up to Christmas is effortlessly next level.
You can get so much play out of a simple refresh on your cubby house space, leaving the kids with endless ways to imagine, create and PLAY! There are plenty of easy DIY crafts to make decorating your Christmas cubby a fun process for both you and the kids - we've shortlisted the best ones below 😉
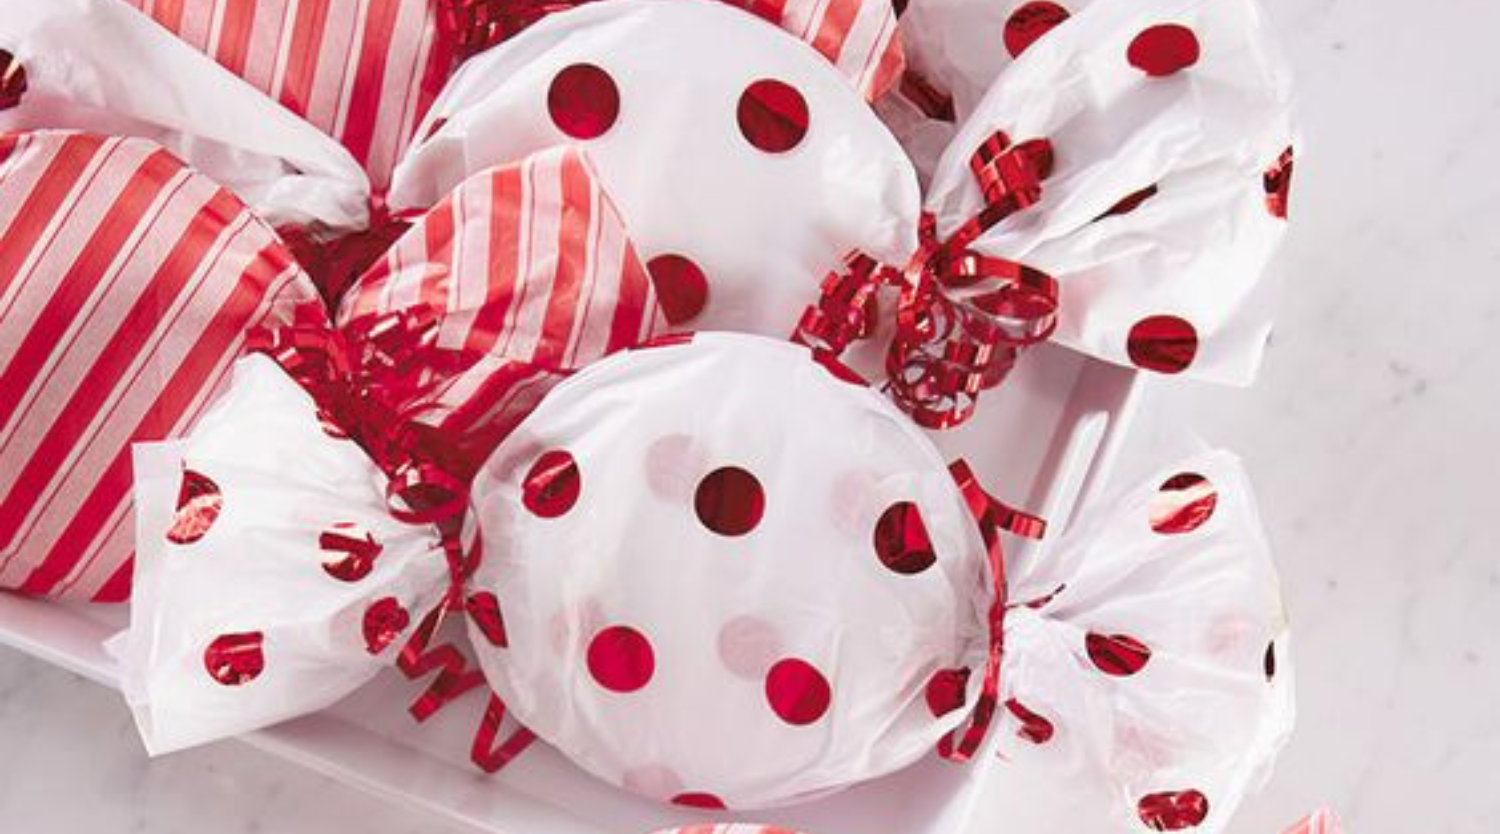
Giant Wrapped Lollies
Stop it - look at these humongous lollies!! Sorry to disappoint kiddos but these are just for show. Big, fun wrapped "lollies" that you can make with just a bunch of wrapping tissue and paper plates, and have them stashed in a basket or stuck around the cubby house for instant gingerbread house vibes.
What you’ll need:
-
Round paper plates
-
Festive wrapping tissue
-
Washi tape
-
Curling ribbon
-
Scissors
What you’ll need:
-
Round paper plates
-
Festive wrapping tissue
-
Washi tape
-
Curling ribbon
-
Scissors
Stack two sheets of tissue paper together, smooth them out and cut into a square about two and a half times as wide as your plate. Using two sheets makes your result a little bit stronger.
Set a paper plate in the middle of your tissue square. Cover with a second plate, flipped upside down. Use the washi tape to attach the edges of the plates in at least three places.
Fold the top portion of the tissue paper over the plates and secure with tape. Repeat with the bottom portion.
On one side, gather the tissue closest to the plate so the ends are still puffed out.
Tie it with a ribbon, then repeat on the other side. Use the edge of a scissor blade to curl the ribbon on both sides.
Adapted from: Hallmark
Christmas Pine Cone Trees
Going from big to little - these tiny Christmas trees made out of pine cones are just about everything you could ask for in Christmas crafts. So simple, and so ridiculously cute too.
All you need are some pine cones, wine corks (another reason to be drinking merry this season), green paint, hot glue and little wooden stars. If you can't be bothered going to the craft store - star anise works a TREAT as a tiny Christmas star topper.
Paint your pine cones your desired shade of green and leave them to dry. Once done, glue your wine cork to the base of the pine cone, and your star to the top. That's it!
Adapted from: El Mueble
Santa Stones
Painting pebbles has got to be a staple kids craft by now. Older kids will enjoy doing these and potentially expanding their pebble range into reindeer, snowman or penguin stones too. Toddlers or pre-schoolers will love using these for counting, sorting and stacking activities.
Step 1
Wash and dry your stones to remove any grit and debris. You'll want them squeaky clean to ensure the paint adheres properly.
Step 2
Prime your stone with a craft primer if you can. Paint bands of colour on stone. You can use the photo as a guide; painting bands of red, skin-tone and white. You may have to do multiple coats if you're not using a primer as a base coat.
Step 3
Dip the handle of a paintbrush into some paint to dot on Santa's pom pom, eyes and nose. Allow your completed stones to dry before applying a coat of varnish to protect your beautiful paint job!
Adapted from: Happy Hooligans
Pipe Cleaner Candy Canes
Two things needed - we're sold! Grab some red and white pipe cleaners from your local craft store, and get twisting.
Wrap the red around the white in a spiral, and twist them until they are wrapped, bend one end of it to get your cane and you're done. Stick these all over your cubby as you please!
Adapted from: House of Hawthornes
Tiny Tea Light Snowman
Grab some battery tea lights, craft paper, glue and a marker and go to town on these with the kids! These will go so great in cubbies, giving warm Christmassy glow as the kids count down to Christmas every evening.
Credit: Tasty Home
Aside from decking out the cubby with the kids in a countdown to Christmas, you can make your cubby a cosy space to do special Christmas things in too.
Bring your Christmas-themed books in, and have special bedtime stories there. Got an advent calendar? Hang it up in the cubby so the kids are in there opening up each day as it passes. Making hot chocolate and cookies? Throw some cushions in the space and enjoy snack time together.
Whatever it is, our cubbies have always been built as spaces to create core childhood memories for kids who love them. Why not add Christmas to the list too?